How To Draw Cotton Candy. Some certain foods and delicacies are associated with certain events and places.
Also, check our Free Printable Stitch Coloring Pages.
Cotton candy is one of them, as this treat is often associated with carnivals, holidays, and other happy occasions.
This treat is technically quite simple as it is essentially puffed sugar. However, the way it is made and its goodness have made it a delight for many.
They also come in many sizes and colors. Learning to draw cotton candy will get you in the carnival spirit again!
If you love this sweet treat and want to recreate it in some artwork, then this tutorial is for you.
Our step-by-step guide to drawing cotton candy in just 6 steps will show you how easy and fun it can be!
How To Draw Cotton Candy
Step 1
When enjoying cotton candy, it can be consumed in different ways. Sometimes, it is wrapped around a thin wooden stick; other times, it can be enjoyed from a paper bag.
We will choose this second option in this cotton candy drawing guide and start with this aspect.
It should be pretty easy; all you have to do is draw two straight lines with a slight curve at the end.
After drawing, you can add some rounded lines to this cone shape to form the cotton candy base. Then, we can proceed to step 2 of the guide!
Step 2
Add the next section to spice it up in this second part of your cotton candy design.
To do this, we’ll add more curved, rounded lines to the base of the cotton candy.
These lines are similar to the previous ones you used for the base. Some of these will overlap each other to make it look fluffier.
We’ll only draw the cotton candy at the base for now but will add more sections over the next few steps.
Step 3
Continuing with this cotton candy drawing tutorial, we will now add the sides of the fluffy cotton candy.
These lines will be very irregular and very similar to those you drew earlier.
Drawing lines like this will help make it look nice and puffy.
As you draw the sides of the cotton candy, try to curve them slightly outwards as we aim for a rounded shape for the cotton candy as a whole. Once these side sections are drawn, we can proceed to step 4 of the guide!
Step 4
In this part of your cotton candy design, you’ll finalize the outline before adding some final details in the next step.
First, draw some more curved lines to complete the outline of the top of this cotton candy.
As shown in our reference image, the top two lines overlap, which helps give the cotton candy shape a little more dynamic.
Once you’ve completed this pattern, you’re ready for the final details we discussed, so let’s move on!
Step 5
Now, you can do the final details and touch-ups before you start the final step of this how-to-draw cotton candy tutorial!
Although these details will be insignificant, they will make a big difference and make the picture more dynamic.
First, add some curved lines along the inside edges of the sides of the cotton candy to give it some depth.
Next, add some stripes along the cone you drew earlier to give it a more carnivalesque flair.
Once you’ve added those details, you might as well add some unique ones!
One idea would be to draw a background, which would be a great way to show where you want to enjoy that cotton candy.
Step 6
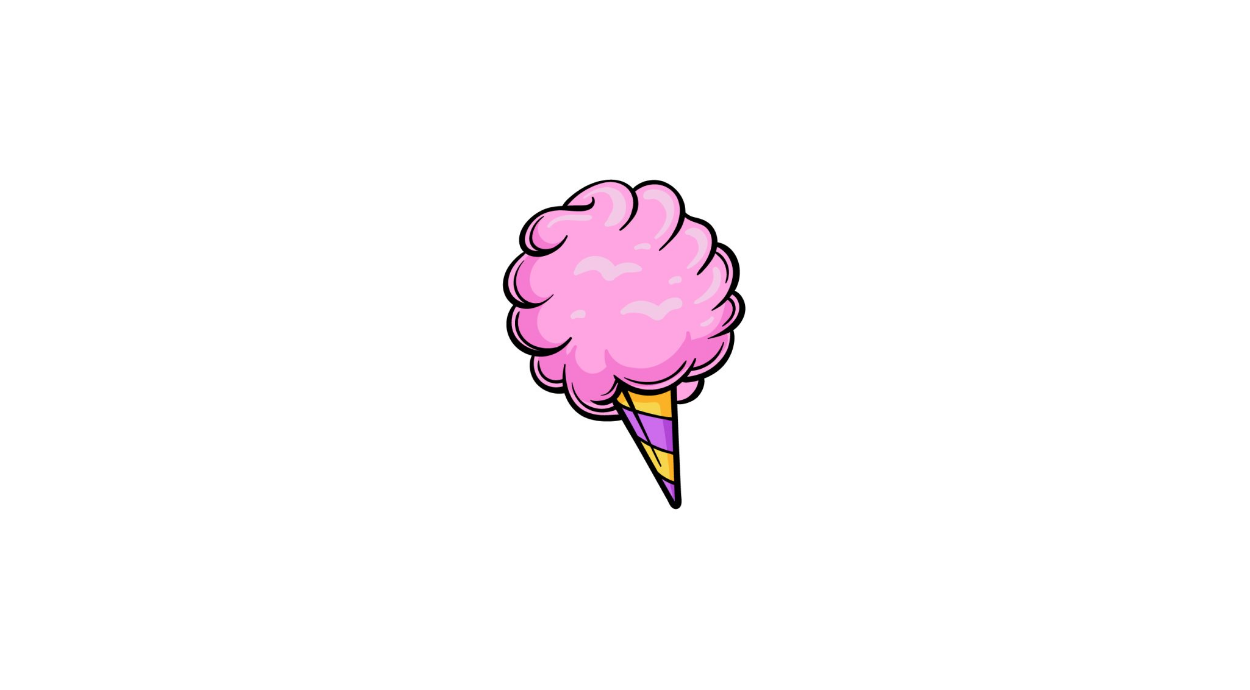
Now it’s time to top off this cotton candy design with some color. This food is usually colored in bright, cheerful tones, giving you much freedom in color schemes.
In our reference image, we used different shades of pink for the cotton candy and then alternated yellow and purple for the bag.
However, this design allows you to use whatever colors you like! You can mix different colors to create a rainbow effect on the cotton candy.
We suggest using some watercolor paints to give the colors a softer look, but whatever you use will look spectacularly gorgeous!
Your Cotton Candy Drawing is Finished!